In this tutorial we are going to explore how to create a tilt shift effect using nothing but Photoshop.
Here's some example of some tilt shift photography.
All tilt shift is doing is playing with the depth of field and manipulating the process your brain uses to determine size. When you look at something up real close that has a lot of detail your eyes can only focus on a small portion of that area, the rest falls out of focus. By re-creating this effect artificially in Photoshop we trick your brain into believing that what is a full size photo of an item is really a miniature version.
The most important aspect to remember when creating tilt shift is your photo selection. Because Tilt shift is a cousin of an optical illusion not every photo is going to work. Photo's generally need to be wide shots of large area's, such as landscapes. Using a photo of you and your friends is going to look weird but your brain will be hard pressed to believe that you are miniature?
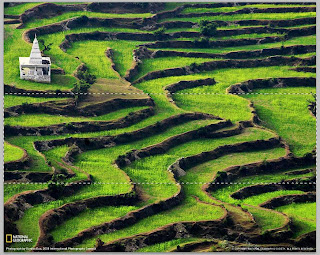
If you want, you can practice on this photo that I found in the National Geographic. Beside being a gorgeous photo, it makes for an awesome tilt shift photo.
Here's the link:
Step: 1
Open your photo in Photoshop.
Double click on the layer, this will open up a new layer dialog box, simply click okay. All this is doing is removing the layer lock on the layer so you can edit it.
Step 2:
Press Q on your keyboard to enter the quick mask mode
Step 3:
While in the quick mask mode, select your gradient tool
Select black to white gradient colors and the select the reflected gradient tool.
Don't be afraid to do this a couple of time, press CTRL Z to undo the last action.
Step 4:
Step 4:
Press the Q key on your keyboard again to exit the quick mask mode. You should see a selection box, you can move this box if need. Only what is inside of this box is going to remain in focus, this box does not have to be centered but it cannot be completely at the top or bottom of the image.


Step 5:
Reverse your selection by pressing SHIFT+CTRL+I
To apply the Blur, Goto the filters menu and select Lens blur, this will open up a new window.
Adjust the radius to find the right Blur level, I like 30 as a good starting point but it will vary from photo to photo. Play around with the other setting to achieve the look you want. Press okay.
That's it, your done!
Your final Result
Click on this image to zoom in!


No comments:
Post a Comment