Step 1:
Open your image in Photoshop.
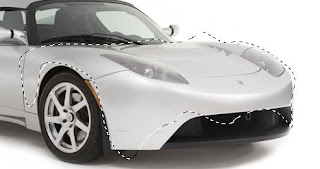
Select the pen tool, we want to create a selection on the front of the car.
Don't worry about making the selection perfect, we don't want to create too many nibs.
Using the "convert point anchor" and the "direct selection tool" adjust the path to some nice curves.
Using the "convert point anchor" and the "direct selection tool" adjust the path to some nice curves.
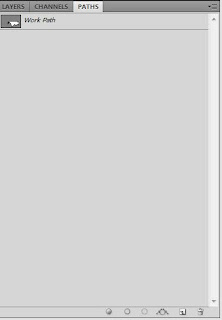
To convert the path to a editable selection, click on the the paths tab ( goto windows menu and select paths if it's not already selected)

In the bottom left of the paths dialog box, click on the third from the right circle, It's the one made up of tiny dots.

You should see your path change to a selection.
Create a new layer and fill this layer with a gradient, use a reflected gradient.
Step 2:
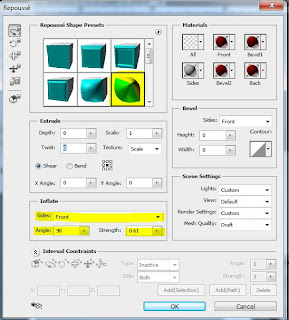
To make the splash look a little 3 dimensional, goto the 3D menu and select repousse, then current selection.
Use the following selections.
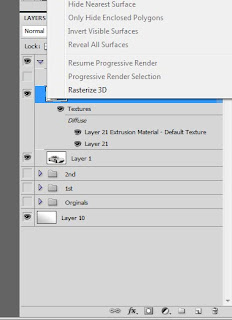
Next rasterize the 3d object by right clicking on the layer and selecting Rasterize 3D
Step 3:
There's a sharp point that was created during the repousse tool, know that the layer's been rasterized we can go and round this out. I am going to use the smudge tool, the liquify filter would do a better job but in this instance would take too long.
Create a new layer beneath the 3D layer. Select the brush tool with a 0 hardness, select black create some shadows beneath our new 3D layer. Drop the opacity of the layer to about 60%.
Step 4:
Next, lets import our pouring liquid into Photoshop. I found this image here:
http://www.traylerandtrayler.com/files/media/thumb/large/Milk_SPlash_L.jpg
Open the image in Photoshop and remove the white background.
Transfer this image over to our working image!
Transfer this image over to our working image!
Scale and rotate the image so it's better aligned with our image.
Step 5:
There's a couple of ways we can extend the milk to the edge of document. For this image we'll use the puppet warp feature. You can find in the edit menu.
Select three point along the stream of milk

Grab the topmost point and stretch the image upward. Be careful as it the bottom will tilt in one direction or another.
Step 6:
Color correction:
This next step can take some skill, Hue and Saturation is a fairly powerful tool in Photoshop. It can take some so be patient.

Once I am happy with my match, use the eraser tool and smudge tool to help blend the two images. I went ahead and merge the two so i could smudge from both images color pallets.

Step 7:
Add some splash, download a nice splatter brush set if you don't already have one. Here's a nice set for free from Brusheezy.com
http://www.brusheezy.com/Brushes/1476-Splatter
A very useful feature in the brush pallette is the ability to alter the perspective. There is a compass that
allows you to adjust the rotation of the brush as idicated by the arrow, there is also two small dots, these allow you alter the perspective of the brush, You this to throw some paint spatter under the car.

Create a new layer under the main splatter layer and throw some paint around.

Next create a new layer and select bevel and emboss and use the following settings.
Use the various brushes to through some more paint around. Once that's done use the smudge tool to blend your spatter into main image.
Change the blending mode of your splatter to Lighten your done.
Thanks
Nathan White
Thanks
Nathan White


No comments:
Post a Comment