
Today I'am going to show you how to create a planetoid in Photoshop.

To begin as always, photo selection is critical. You generally need to start with a panorama but that is not necessary, the wider the photo the better the planetoid is generally going to be. To create our temple planetoid where going to start with nine photo's I took of the Salt Lake Temple in Utah.

Step 1:
You can skip this step if you already have an image you'd like to use.
We need to stitch these photos together. To do this, goto the file menu, automate, photo-merge

Use the photomerge dialog box to select the image's you'd like to use.
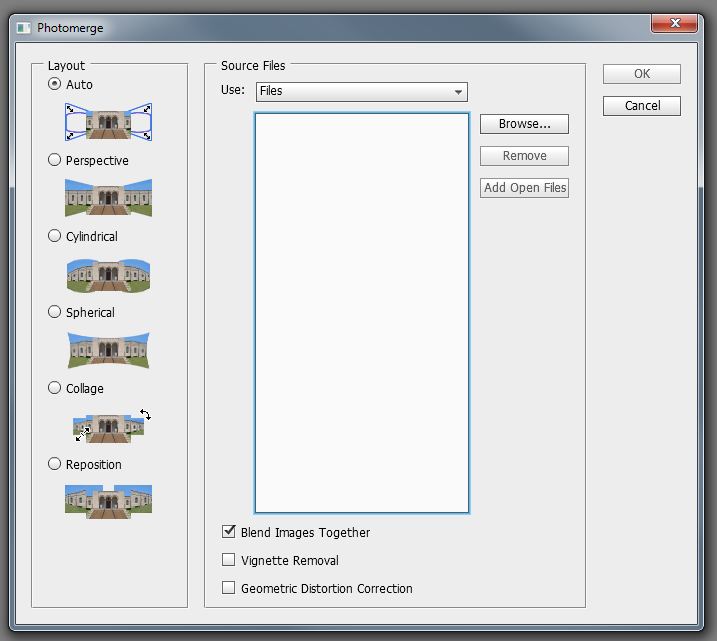
This next step can take a bit of time so be patient.
Step 2:
Photoshop outputted this merged photo.

Little skewed, but thats okay.
Press SHIFT+CTRL+E to merge the visible elements of your panorama.
Step 3:
Rotate you image so the element you want to be most prominent is as vertically centered as possible, I used a guide to ensure that I had the center spire centered just right.

Once satisfied, Crop the photo. We want as large an area as possible, don't worry if small areas are cropped out we will fix that next.

Step 4:
Using the Clone Brush and Spot Healing brush to fill in any areas that need it.
Using the Clone Brush and Spot Healing brush to fill in any areas that need it.

To make a cleaner image I removed the building that was in the background the family that was sitting in the lower left of the image. This doesn't have to be perfect so don't spend too much time trying to achieve perfection.

Step 5:
Goto the Edit menu, transform, flip vertical (this is critical for the image to look right)
Then goto the Filter menu, distort, polar coordinates.
Rectangle to polar.

In the open Polar Coordinates dialog box, select Rectangular to Polar and click okay.
Step 6:
You should have your image done but it's upside down. Goto the Edit menu, transform, flip vertically. You should have a complete image.

Next lets remove the background, theres a couple of ways to do this but with this image, the magic wand is sufficient.

Then use the Rectangle marque tool to select the bottom half of the image.

Press CRTL C then CTRL V to copy and paste your selection into a new layer. Then goto the Edit menu, transform, flip horizontal.

Line up the right half of the image so the tree's and the wall are aligned.

Use a eraser with a hardness of 0% to erase the left side of the image and soften the right side edge up.
Change the hardness to about 50% and clean up the far right tree's so they blend better.

Use the Clone brush and spot healing brush to merge the seam. It's not going to be perfect but get it as close as you can.

Depending on how perfected you'd like it to be, you can go in and replace the center of the planetoid with a perfect circle and blend it better but I don't believe that is necessary.
Step 7:
Replace the background.
Search Google for a nice sky background and open the photo in Photoshop.
Transfer the sky photo to our working image.
You will see some imperfections in our planetoid image around the edges, not too worry, we'll fix those right now.

Duplicate the planetoid layer and change the original layer to Multiply
Select your eraser tool and set the opacity to 25% an a hardness of 0%
Select the planetoid copy we just created and erase the edges where the white is showing through.

That's it your done.
Nathan White
Click on the image to zoom
Hey this is great I was wondering do you have to have multiple photos and stitch them together? What if you only have one photograph? Should I make 9 different ones at different angles and then put them together?
ReplyDelete