Monday, May 23, 2011

Create a likable Facebook promotion with a custom dropbox form

To create your promotion follow these simple steps.

Step 1: 
On the left side of Facebook, you'll see a tab for pages.


Select the kind of page you'd like to create and fill out the required information.


Step 2:
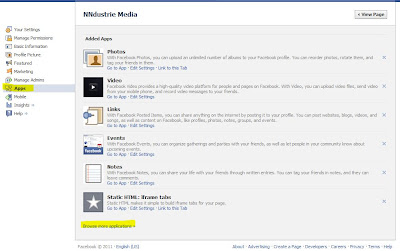
Click on the "Edit Page" button in the top right corner of the page.

 Then goto the apps tab.
Near the bottom of the page is a link to Browse more application, click on that  or
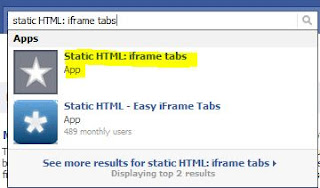
type: Static HTML: iframe tab in the search window

I had some trouble with the second app, the first is UI is not a pretty but it worked better.
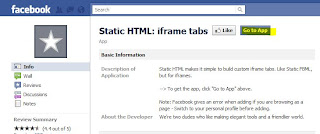
Click on the Go to App button to install the app.

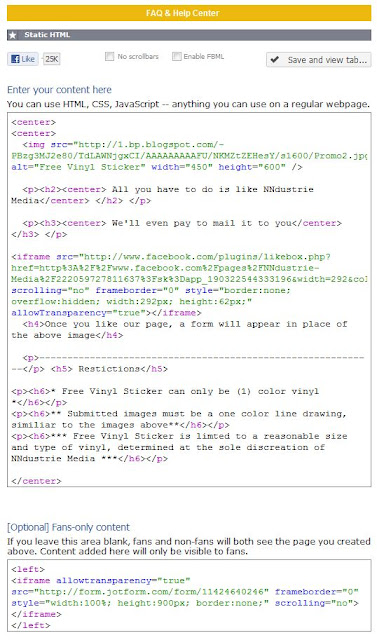
Now that the app been installed on your Facebook page, click on the name of the tab to edit
(don't click on edit, for whatever reason it's linked to the edit page not the app)

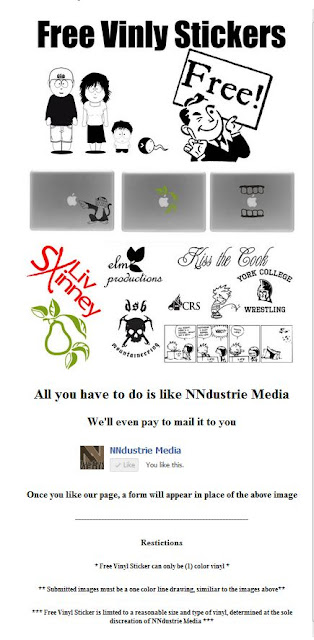
As it explains, you can enter any HTML,CSS or JavaScript in the available boxes, I referenced  an image and some text that I wanted to be displayed to those not fans of my page.

Now when a new customer comes to my page, they will see this incitement to like my page.

 Step 3:
Create the custom Form
Jotform has a free product that is pretty freaking sweet.
For free you can create a custom form, with uploads that will
deposit the uploaded files to a dropbox account w/ a PDF copy of the form.


The free account is limited to 100 submission and 100 MB a month.
Not too shabby for free!
to setup your free account.

If you don't have a Dropbox account, click here to setup one for free:

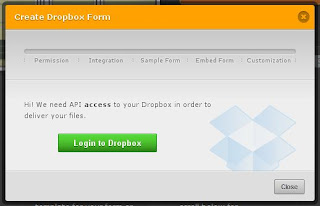
Once you have both accounts setup, follow the instruction to setup a dropbox form.
This part is mostly automated.

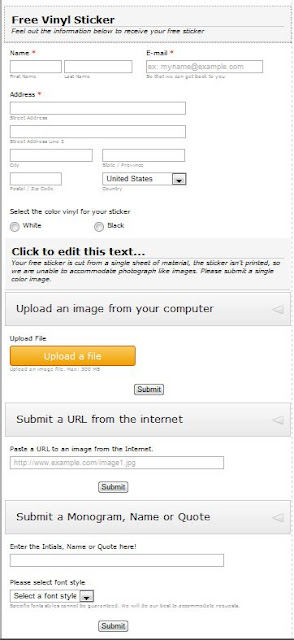
JotForm has one of easiest WYSIWYG form creators that I've found.
Simply drag and drop the elements you want to create your form.

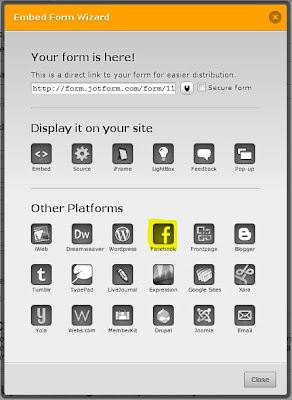
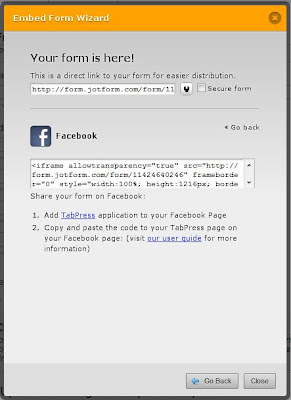
Once your form is finished, click on the embed options.

JotForm will create the iframe used by Facebook.

Since you already installed the Static HTML App you will not need to install the TabPress app.

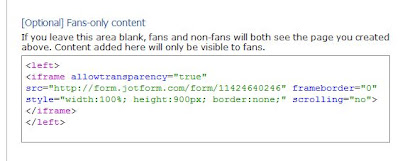
Paste the iframe code from JotForm in to the Fans only content portion of the Static HTML App

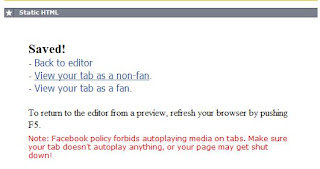
Save and view tab

You can then view your promotion from a Non-Fan and Fans point of view.

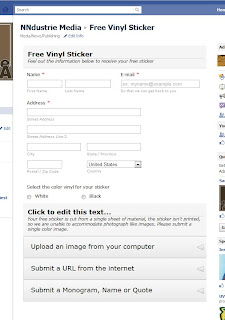
The form as a fan of NNdustrie Media will see it.

Step 4:

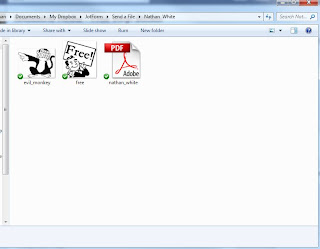
JotForm will create a folder in your Dropbox

A couple of test images that I uploaded and the PDF document contain the from data.


That's it. you've now completed a Likable promotion for Facebook.

Monday, May 9, 2011

Pad Printing Step by Step

Today I'am going to show the pad printing process.

Pad printing is a printing process that use silicone pads to transfers ink from an etching to virtually any object regardless of shape.

Step 1:

To begin, we need something to print, this can be a Logo, Image, or Saying.
For this tutorial, I am going to use a Job I just completed for Holiday Inn.
They wanted a custom blinky to hand out at trade show they where attending.
We printed 500 pins of these pins for them.

They emailed me the Holiday Inn logo and I vectorized it and added the West.


Step 2:

If needed, the logo or image is then converted to vector graphic.

Most images are Bit-mapped which means they are comprised of square pixels, which creates staircase steps which can lead to prints that are not crisp and clean.
(Bitmapped image)

For printing, we need vector images, which are comprised of mathematical equations, these create super crisp lines which is necessary for a good print.
(vector image)

Step 3:

With the vector conversion completed we can print out our transfer image, needed for step 4
We use an HP 1300, because it prints at 1200 dpi which means a darker image.
For transfer to our light sensitive material, the darker the image the better.

Step 4:

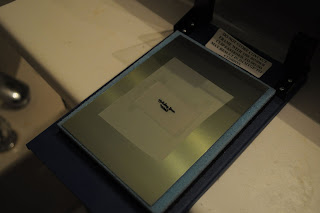
With our transfer image created we then place in on a metal plate that has been coated with a light sensitive emulsion. When this plate is exposed to ultra-violet light, the emulsion will harder except where our image is place, that emulsion will remain soft allowing us to wash out the image.

(Transfer placed on light sensitive plate)

(Exposing the plate to ultra-violet light to harden the emulsion)


Step 5:

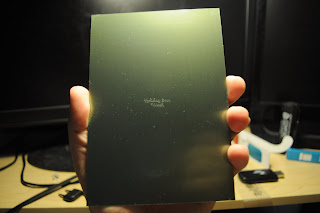
Once the plate has been exposed, it is washed out using warm water to expose the image.

Because the transfer protects the emulsion from hardening, we don't have to use a negative image, the plate etch is a duplicate of the transfer print we made on the HP printer.

(click to zoom the image)


Step 6:

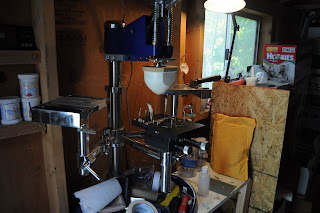
Now we move on to setup the printer.

It's a bit messy but it works

For this print, we'll use a ink that requires a hardener be added as well as thinner.
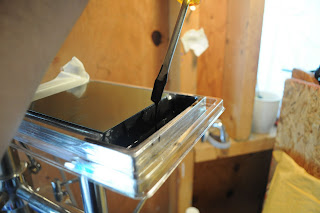
Once mixed, it will have the consistency like a wood stain.
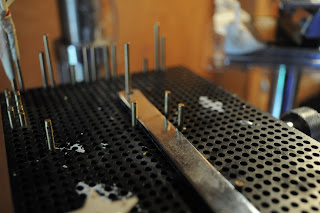
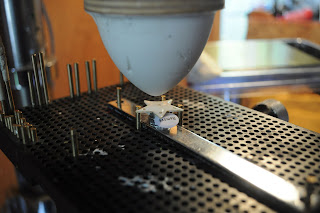
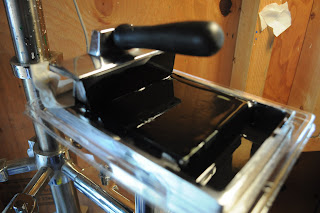
I use a pin table, which allows me to position metal pins to create a custom holder for whatever I'am printing, Because these pins are magnetic, I use the metal bar to help hold the pen in place.
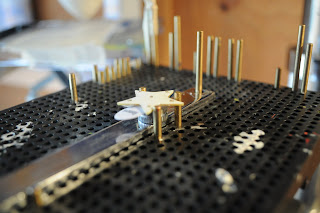
Want to make sure I can position and remove the pin quickly and easily.


Step 7:

With the pin table and ink setup and ready to go it's time to start printing.

Using an ink spreader, I spread a generous amount of ink across the plate, then using the blade attached to the front of the ink spreader, I scrape the excess from the plate back to the inkwell.
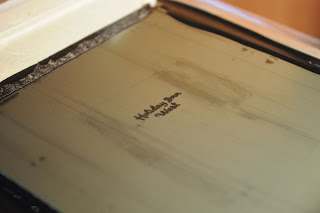
This remove all the ink, except a couple microns thick amount of ink that is left within the etching.

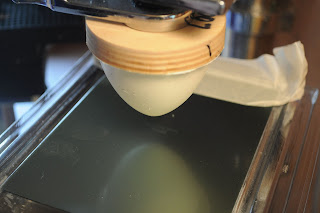
Then the silicone pad is pressed onto the etching, lifting the ink out of the etching.
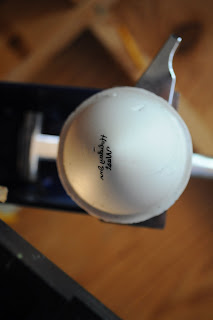
You can see the ink on the silicon pad

The silicon pad is then pressed onto the pin, transferring the ink to the pin.
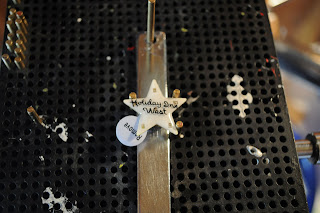
The ink dries to the touch in about 30secs so I have to move fast.
(Yes I know the image is a bit crooked, I was still making small adjustments)

Step 8:

Repeat 500 more time
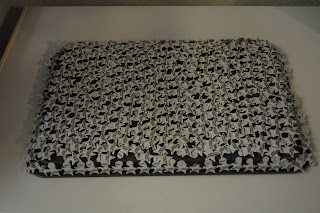
This pan contains about half the pins.

Once printed the pins are then baked at 200 degree for about 2 minutes to help cure.
The ink I use takes about 3 days to fully cure but once cured the ink will most likely outlast whatever it is printed on.

Here is the finished pin
Step 9:

Now for the fun stuff, repacking each pin. unpacking them took about an hour.
Repacking too as long as:
"Smoking Ace's II" (awful movie)
3 Everbody loves raymond
2 king of the hill
1 & 1/2 Futurama.

Needless to say, It took forever.

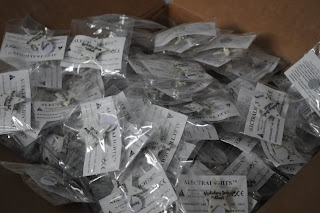
Each pin is packed with instructions and a second magnet inside a poly bag.
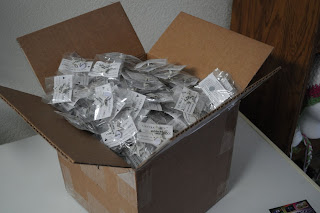
All 500 pins packaged.
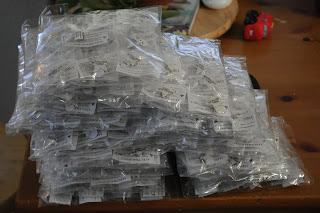
500 pins divided into 25 piece bags

Thats it. the pins are boxed up and shipped to the customer.


Friday, April 1, 2011

Create an HDR Image from any Image

Today I am going to show you how to create an HDR image from any image.

HDR which stand for High Dynamic Range is a highly stylized method of photography.
Generally accomplished by shooting multiple images at different shutter speeds in a RAW format on your camera.

When these multiply images are merged in a photomerge program like Photoshop or Photomatix etc. you can achieve interesting effects.

Unfortunately you may not have access to a camera capable of shooing in RAW or simply want to take an existing image and convert it to HDR.

Lets Begin.

STEP 1:

Open Photoshop.

In the File tab you will see several option for opening an image.
For CS5 instead of Open, we'll use Open As and change the format to Camera RAW
For CS4 use the regular Open, but in the bottom left corner where it shows the format, change it to Camera RAW.

There are two RAW formats in Photoshop, Use the Camera RAW not the Photoshop RAW format.

When you click open, the image will be opened up in the Camera RAW editor.
You can then access most of the options available for RAW images, however limited by the low bit depth associated with Non-RAW image.

For our purposes today, were just going to adjust the Exposure setting.
For this first image, let's drop the exposure three stops to -3
In the bottom left corner of the editor there is an option to Save image. Save this image with a -3 added to the file name.

STEP 2:

Duplicate step 1 using the same original image but this time, were going to bump the exposure to +2.

Now we have three images with different exposure settings, which should be sufficient for our needs.
Original image

Under exposed by -3

Over exposed +2

Now we need a Photomerge software.

There are a couple of options.
1. Photoshop - Even in CS5 the HDR capability is awful when compared to other third party options, so while there are some uses for photoshops photomerge tool it is lacking for the average user.

2. Photomatix - One of the best in the market and comes with a full free trial, however it watermarks the final images.

I prefer photomatix as it offer far more flexibility than Photoshop.
You can download a free trial version here
or


STEP 3

Open up Photomatixpro

If your using the trial version, select continue trial and
then load bracketed photos.

Load the three image that where prepared earlier.

Because we are using the same image with forced exposure values, photomatix is going to balk just a bit, I have found leaving the EV Spacing at 2 works most of the time.

The next window to pop-up is the pre-processing options-
Since we are using the same image there is no need to align the images
or to reduce ghosting

However select reduce noise on the merged image.

Click Okay.

STEP 4:


Photomatix comes with several popular presets but rarely does it nail  it without some tweaking.

I find it useful to choose the preset that comes the closets than tweak from there.


Once happy, click Process


Photomatic will do it's magic and presto you have yourself an HDR image created from a single image.

You can convert almost any image, from your cell phone or a cheap point n shoot. Just remeber that with any image process, garbage in garbage out. Converting a bad image will only create a bad HDR.


Below is sample of some image I converted using this process.